
Driver Web Experience — Overview
This page provides a step-by-step overview of the driver's workflow when using the HSC Transportation web application. Each step includes a representative screenshot and detailed, professional guidance for what drivers will see and do.
What the driver does
Drivers sign in using their registered email address and password. Successful authentication takes the driver directly to the dashboard where active runs (if any) will be shown. If credentials are invalid, the system returns an accessible error message and guidance to reset a password.
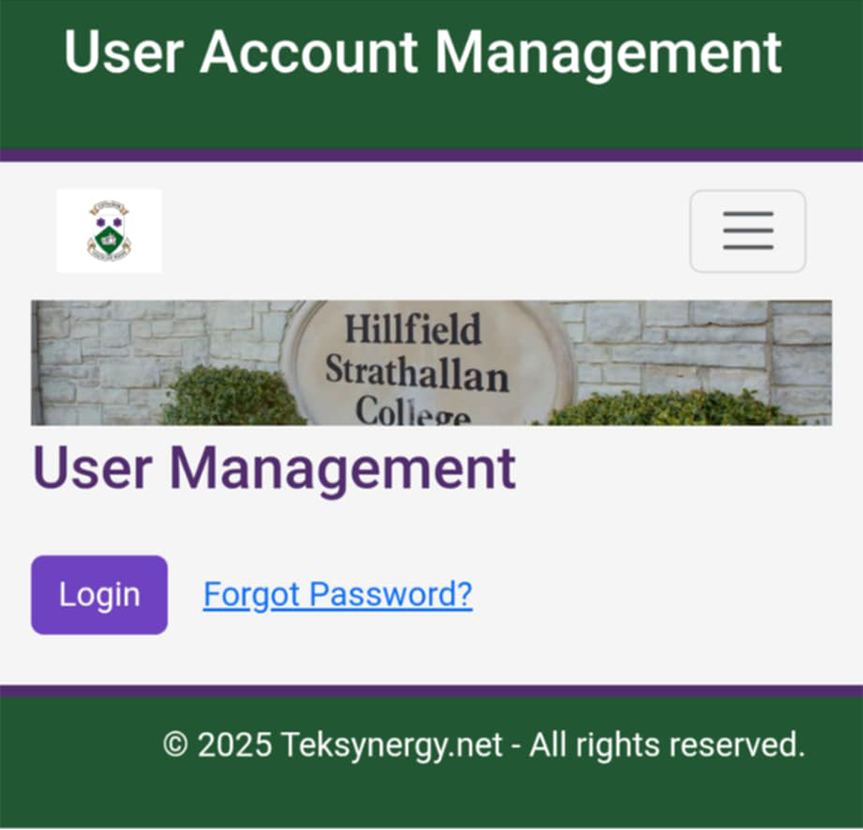
Overview
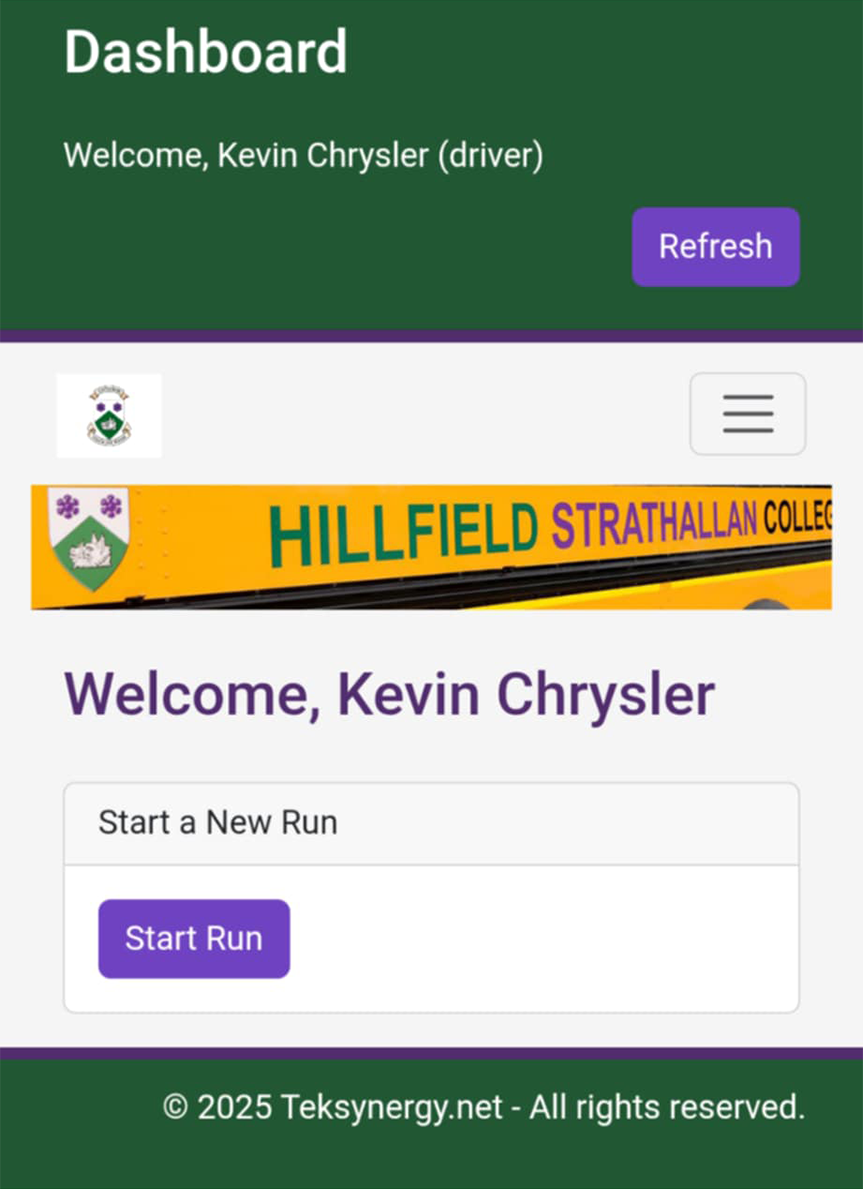
Immediately after login, drivers see a welcome banner and the dashboard. The dashboard surface differs depending on whether the driver has an active run or not.
2.1 No active run — Start a New Run
When the driver has no active run, the dashboard prominently displays a Start New Run button and a compact summary of available routes. Drivers can begin the process by pressing Start New Run.
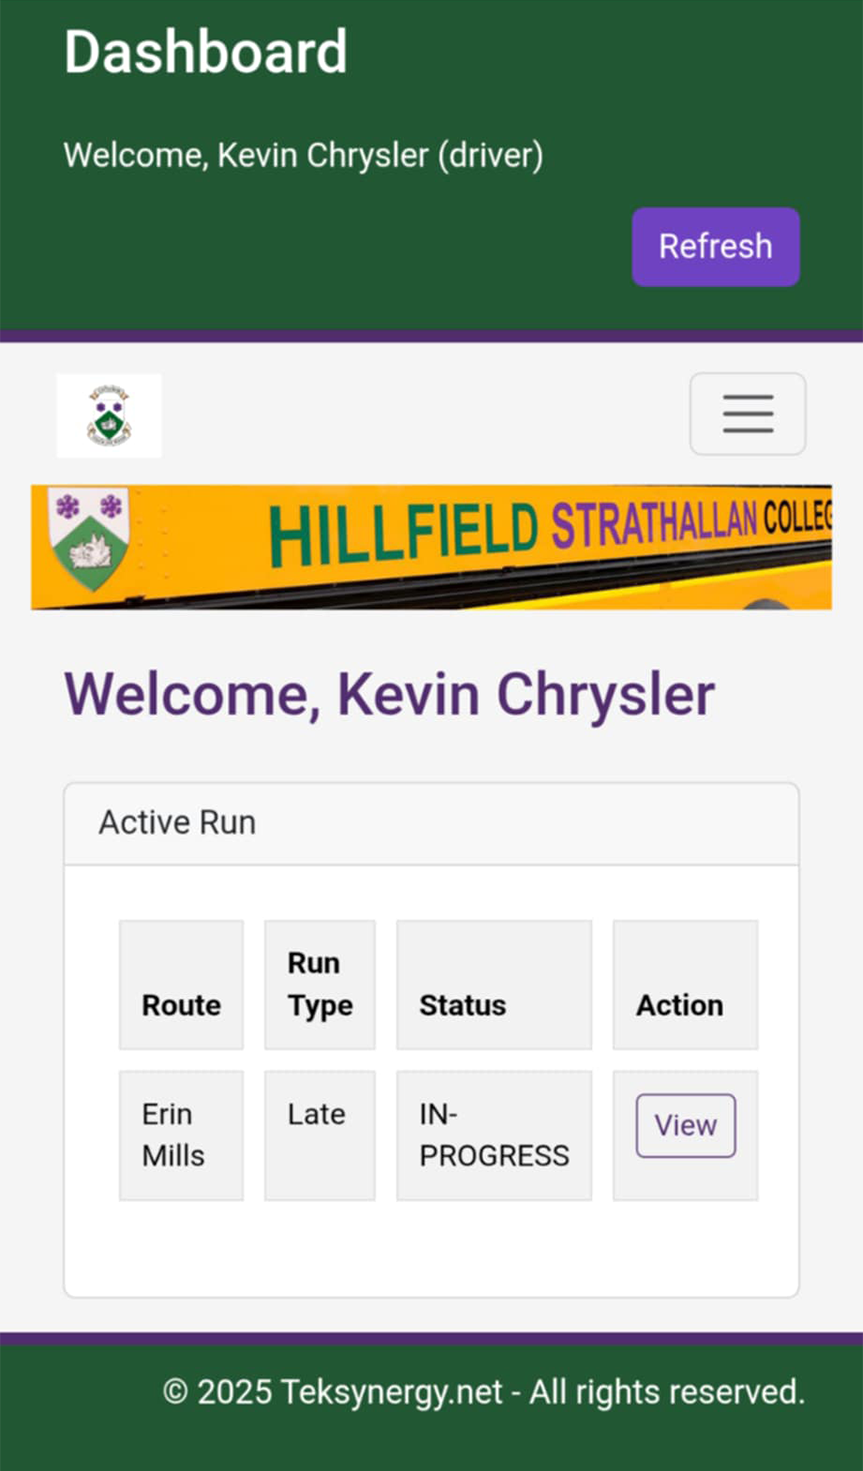
2.1 (alternate) Active run in place — View Run
If there's a currently active Run, the dashboard displays the active Run summary including Route, Run Type, start time and a View Run button that opens the run details screen.
2.2 — Selecting Route & Run Type
After pressing Start New Run, drivers are presented with controls to select the Route and then the Run Type (AM, Early, Late, No-Late). Both dropdowns are keyboard accessible and clearly labeled.
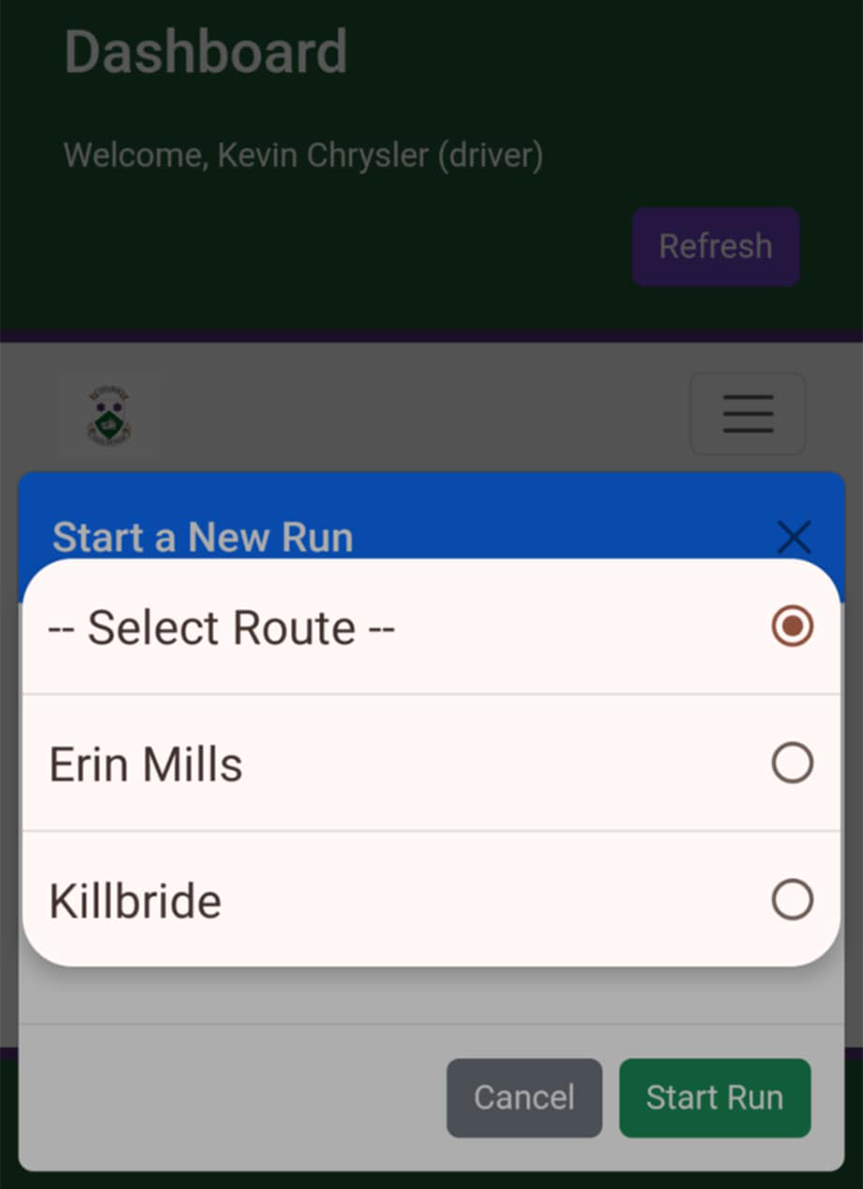
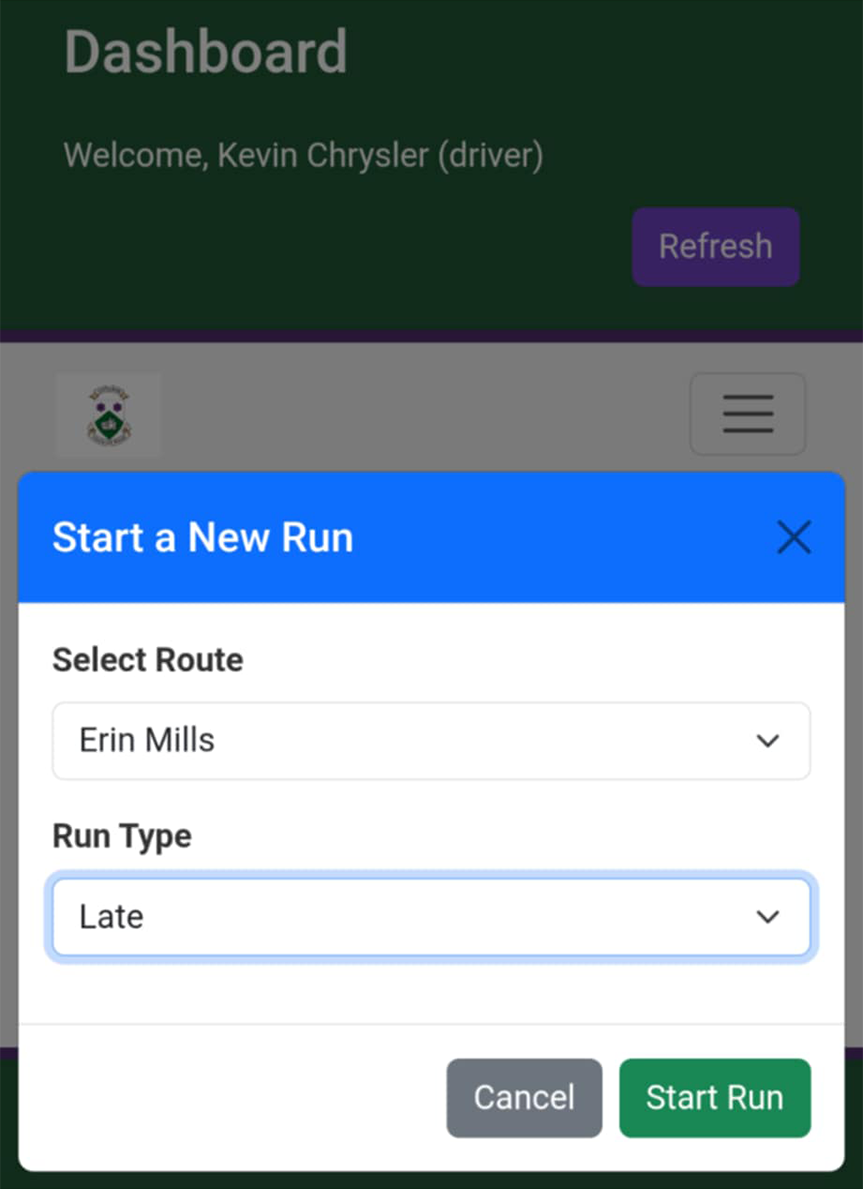
Once Route and Run Type are selected, drivers press the Start Run button to move to the stop selection stage.
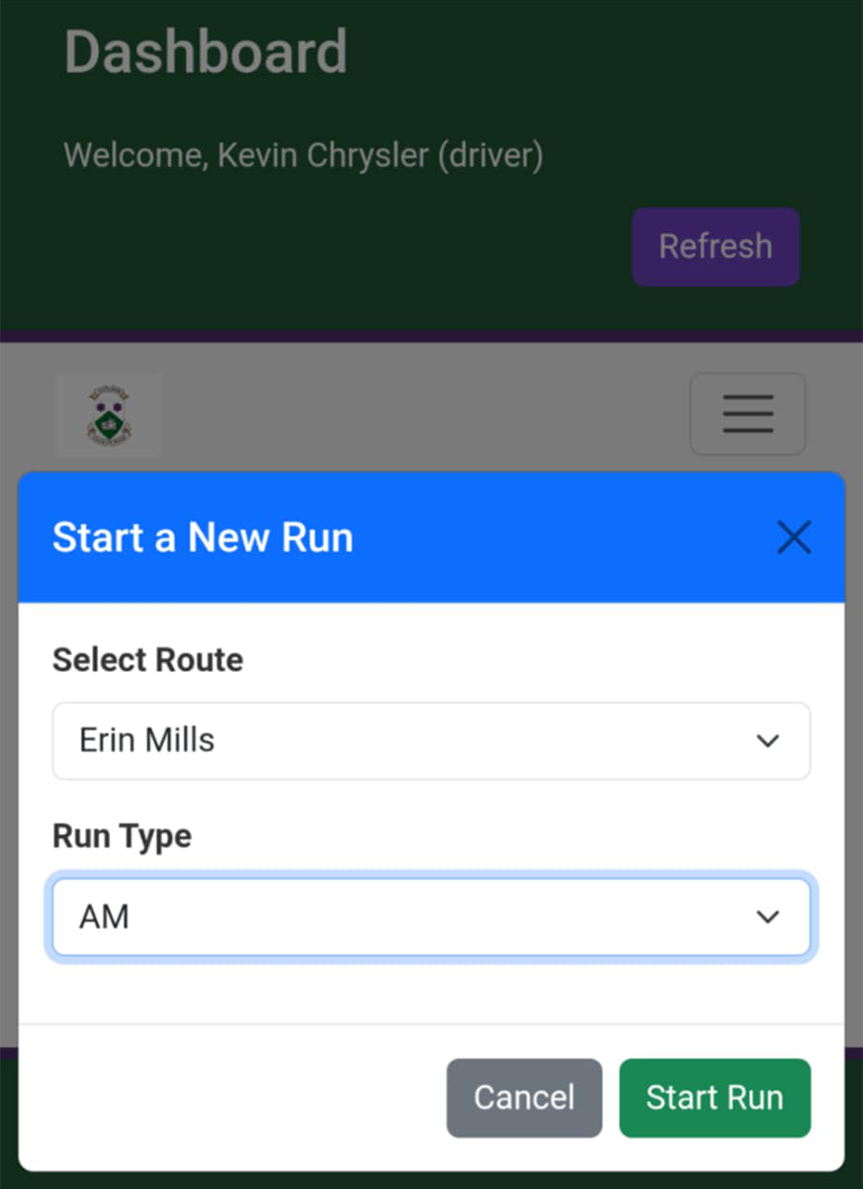
Stop selection behavior
Depending on the Run Type, the stop selection step behaves differently:
- AM Runs: All stops on an AM run are required by policy. When AM is the Run Type, every stop is pre-checked, marked as required and cannot be deselected by the driver. This prevents omission of morning pick-ups. (Examples below.)
- Other Runs (Early, Late, No-Late): Each stop is presented with a checkbox. Drivers check a stop when a student for that stop is boarded/required for the current run. Only checked stops will be serviced.
AM Run — required, non-editable stops
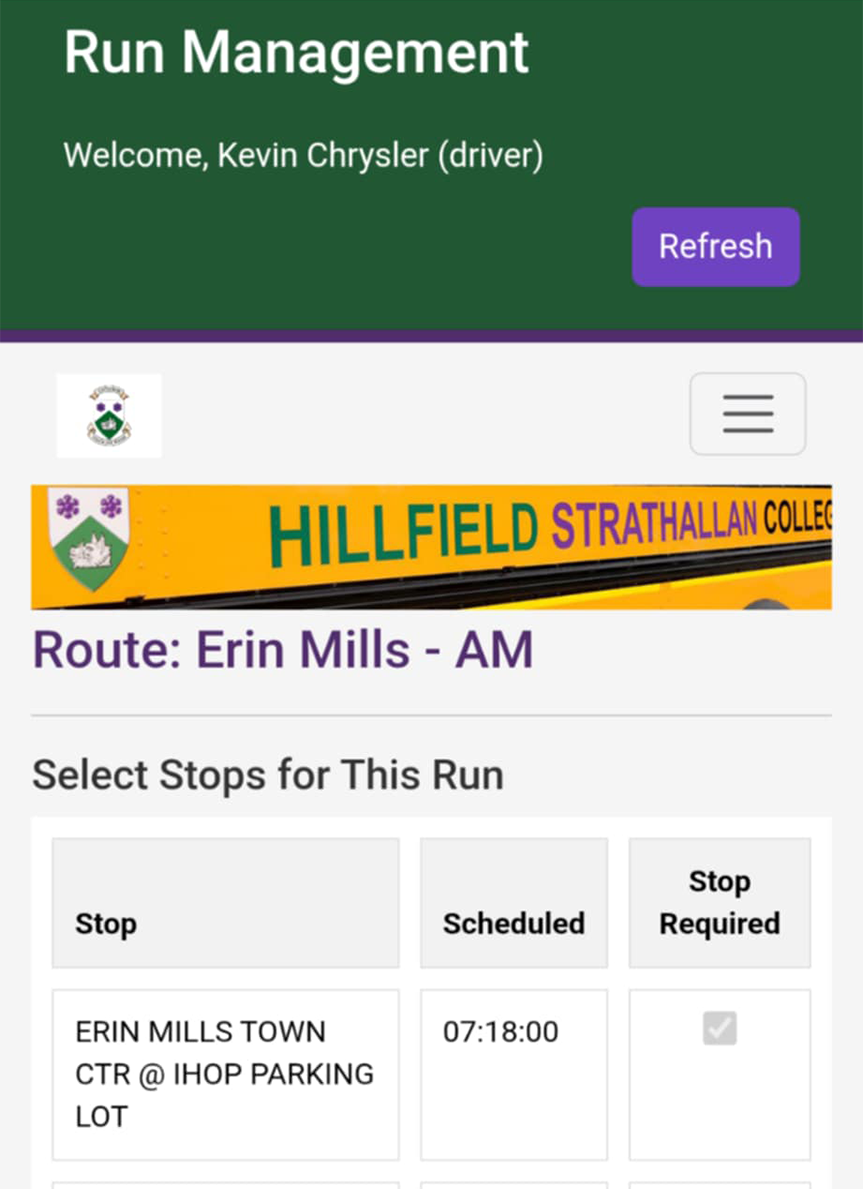
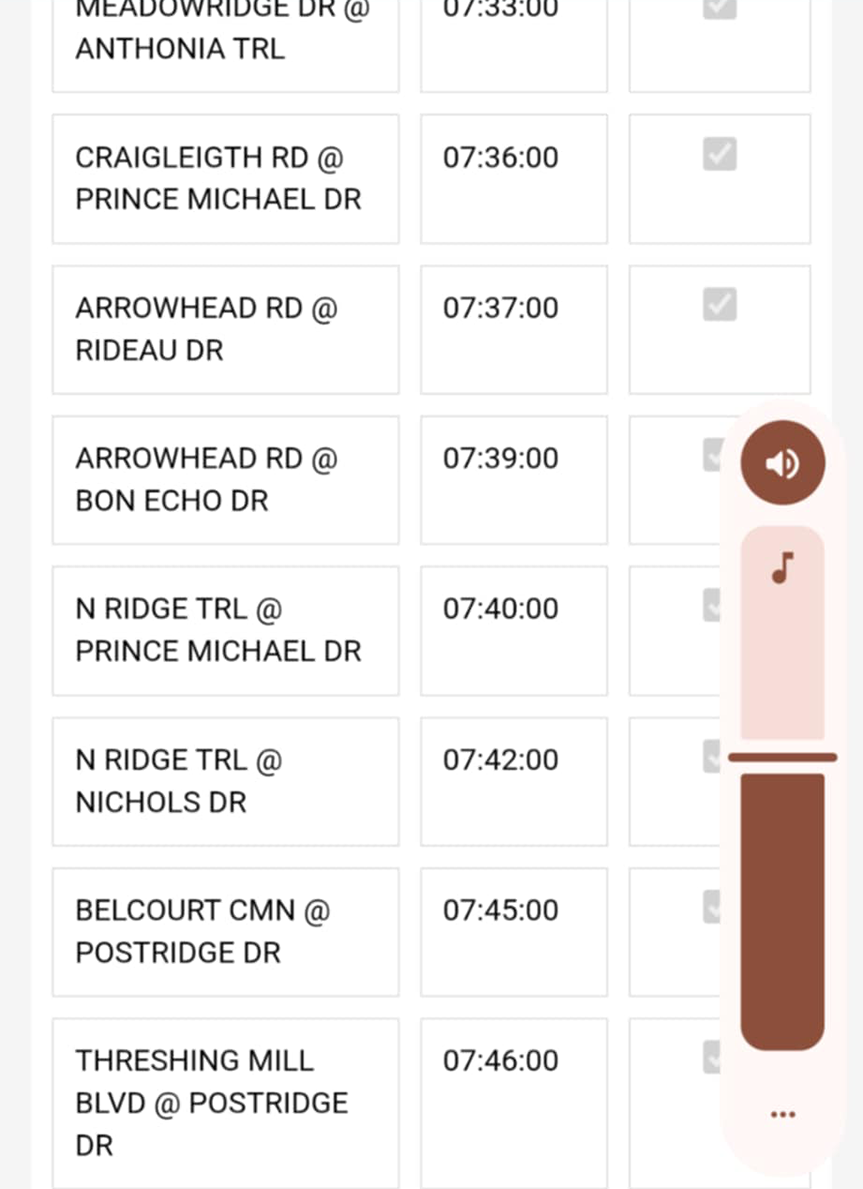
Optional stop selection
For non-AM runs the driver will see a full list of stops with checkboxes. When a student boards for a stop, the driver checks that stop to mark it required for this run. After confirming all expected students are accounted for and desired stops are checked, the driver presses the Start Run button to begin.
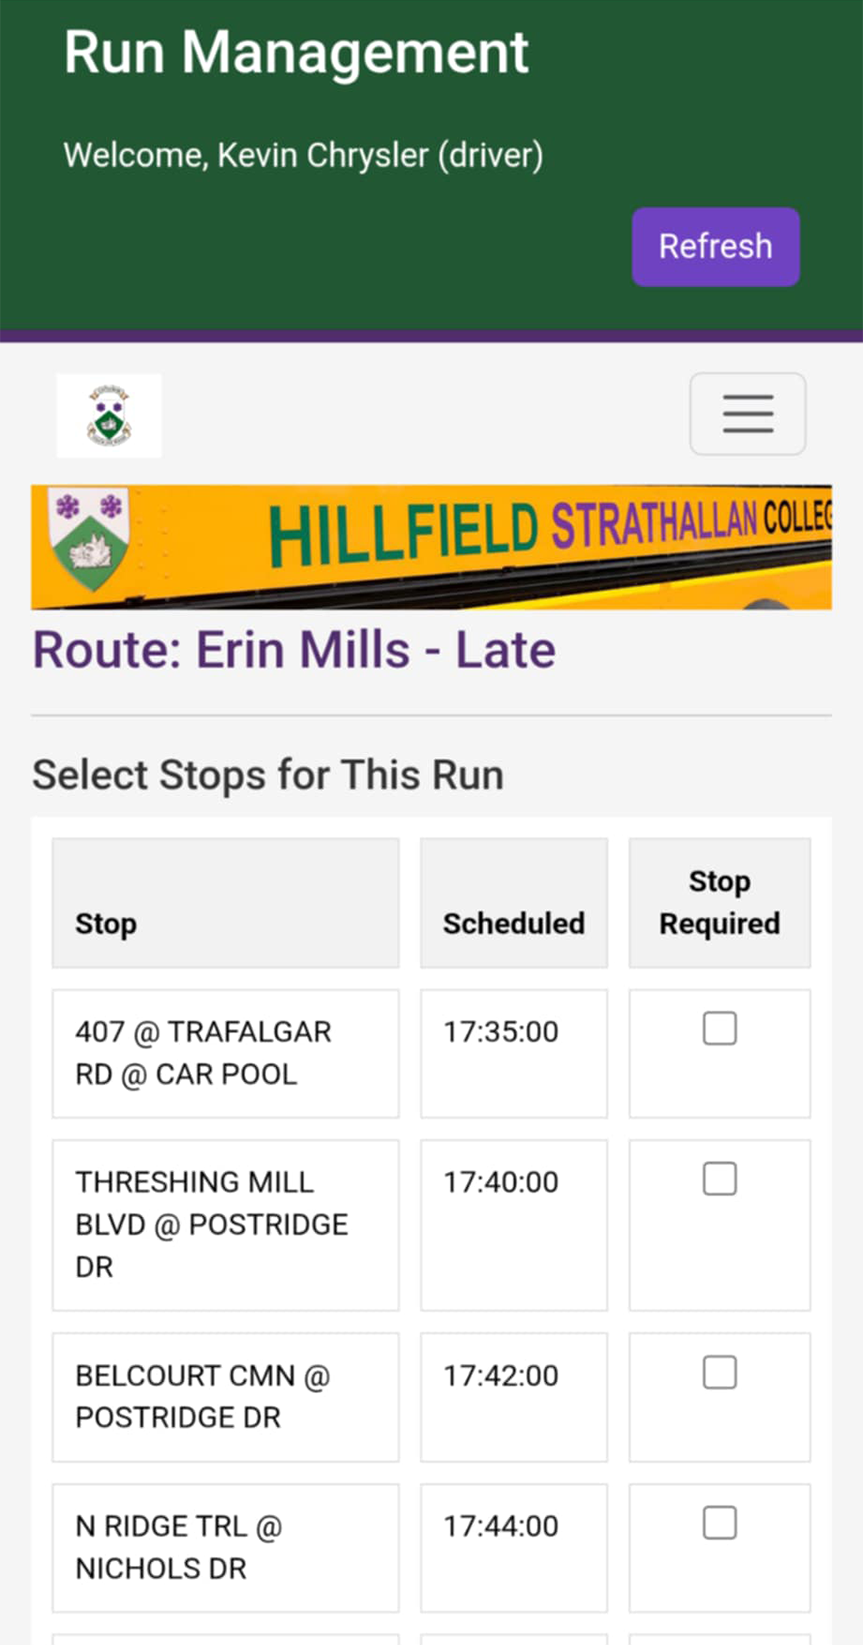
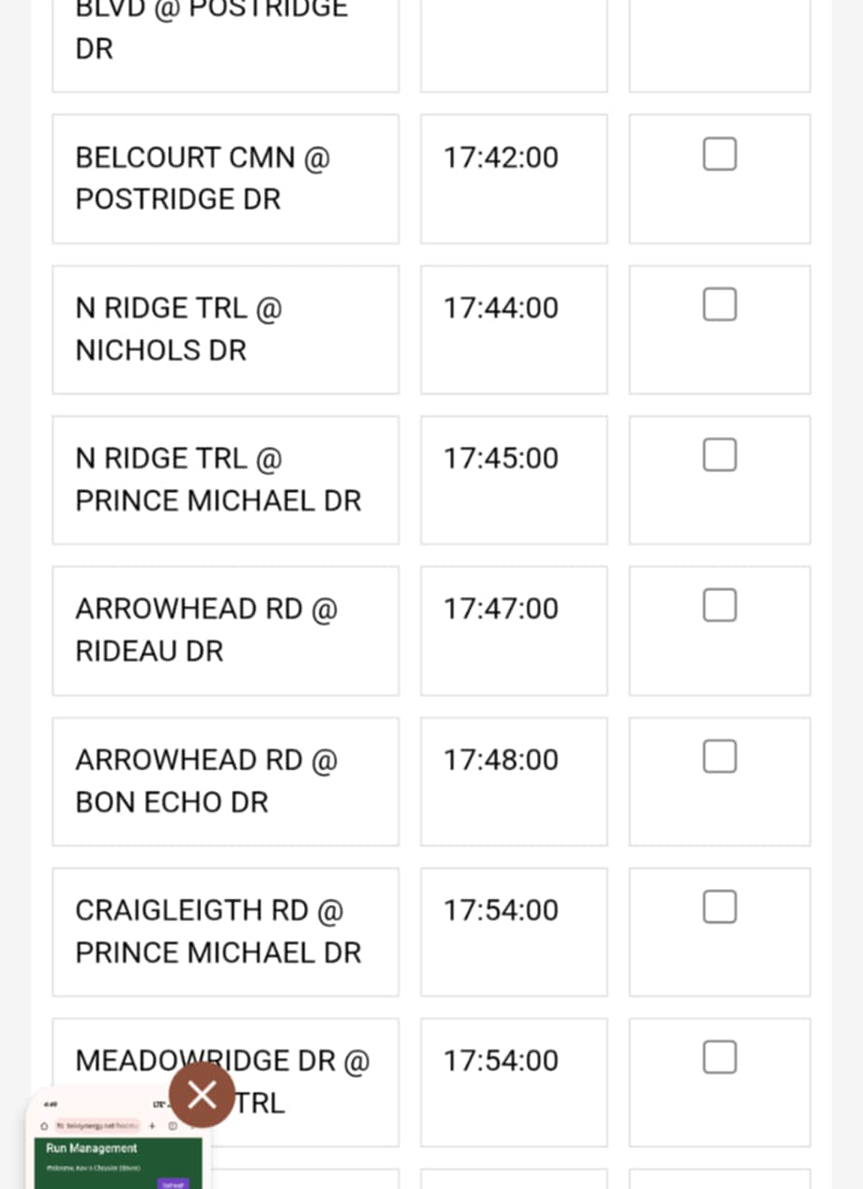
Run management screen
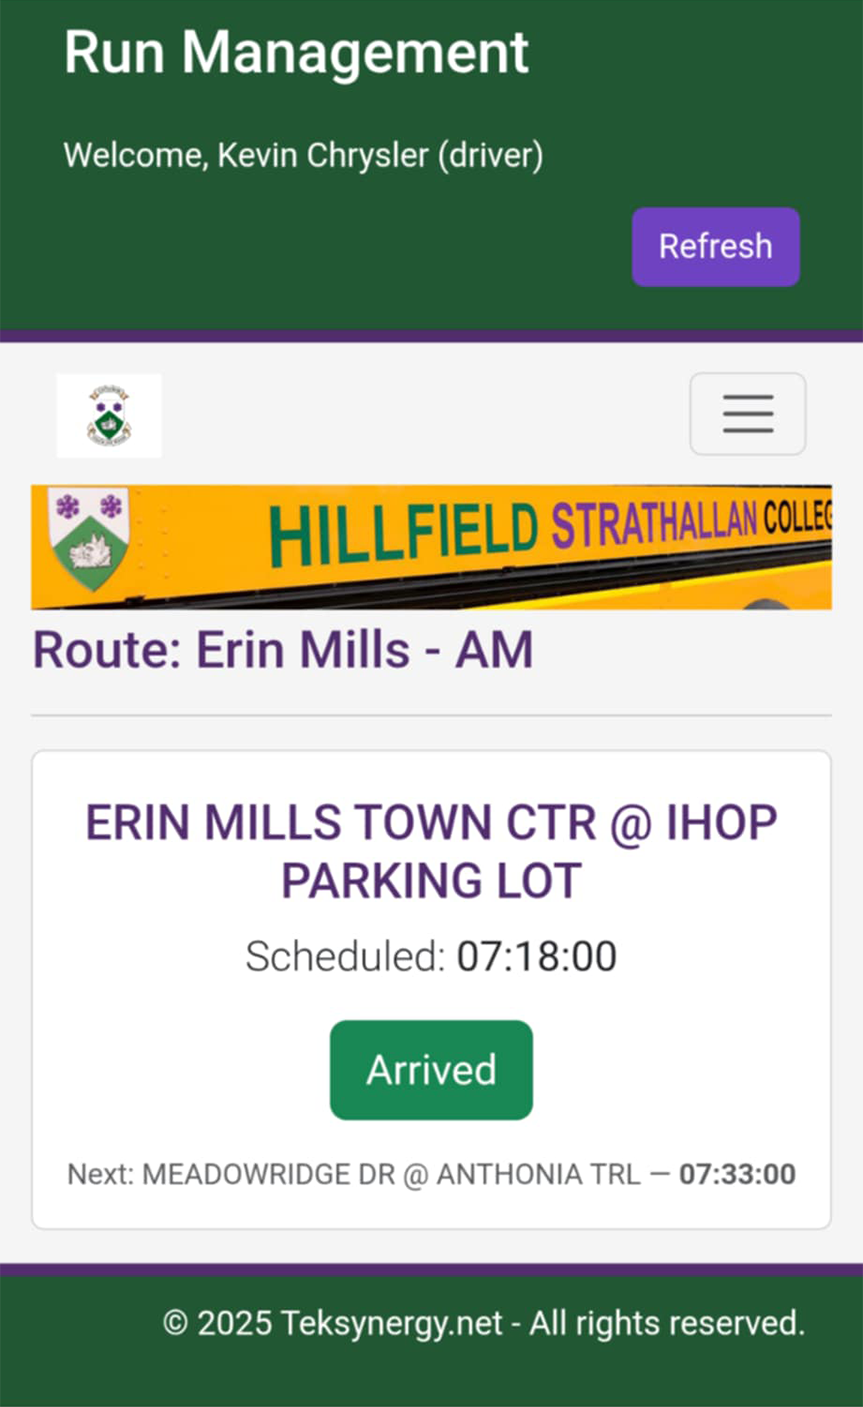
Once the run starts, the driver is taken to the real-time run screen that shows:
- Upcoming Stop (name & address)
- Scheduled arrival time
- A prominent Arrived button the driver taps when at the stop
- The next stop in the sequence and a small run progress indicator
Behavior & safety notes
- Tap Arrived only when safely stopped at the pickup/dropoff location.
- When Arrived is tapped, the UI confirms pickup/dropoff details and advances to the next stop.
- The system stores timestamps for arrivals and completions for reporting.
Completing the run
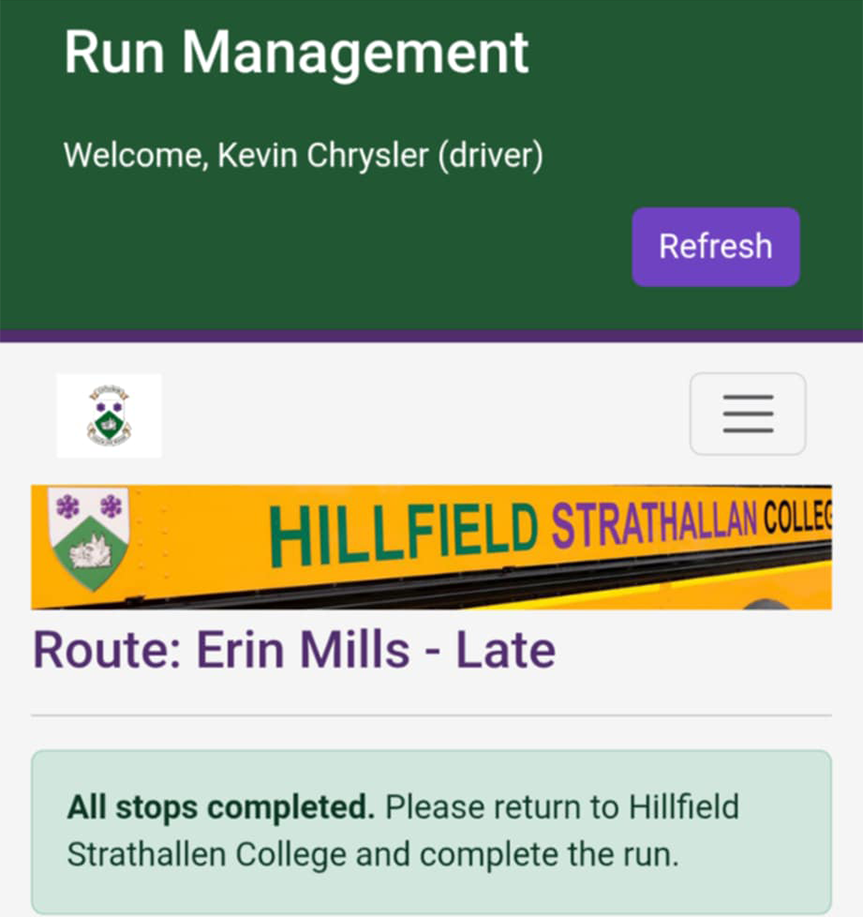
When all checked stops are serviced, the app notifies the driver the run is complete and prompts them to return to HSC. Once the driver has returned and completed final duties (fueling, checks, paperwork), they press Complete Run to finalize the record.
Post-run review
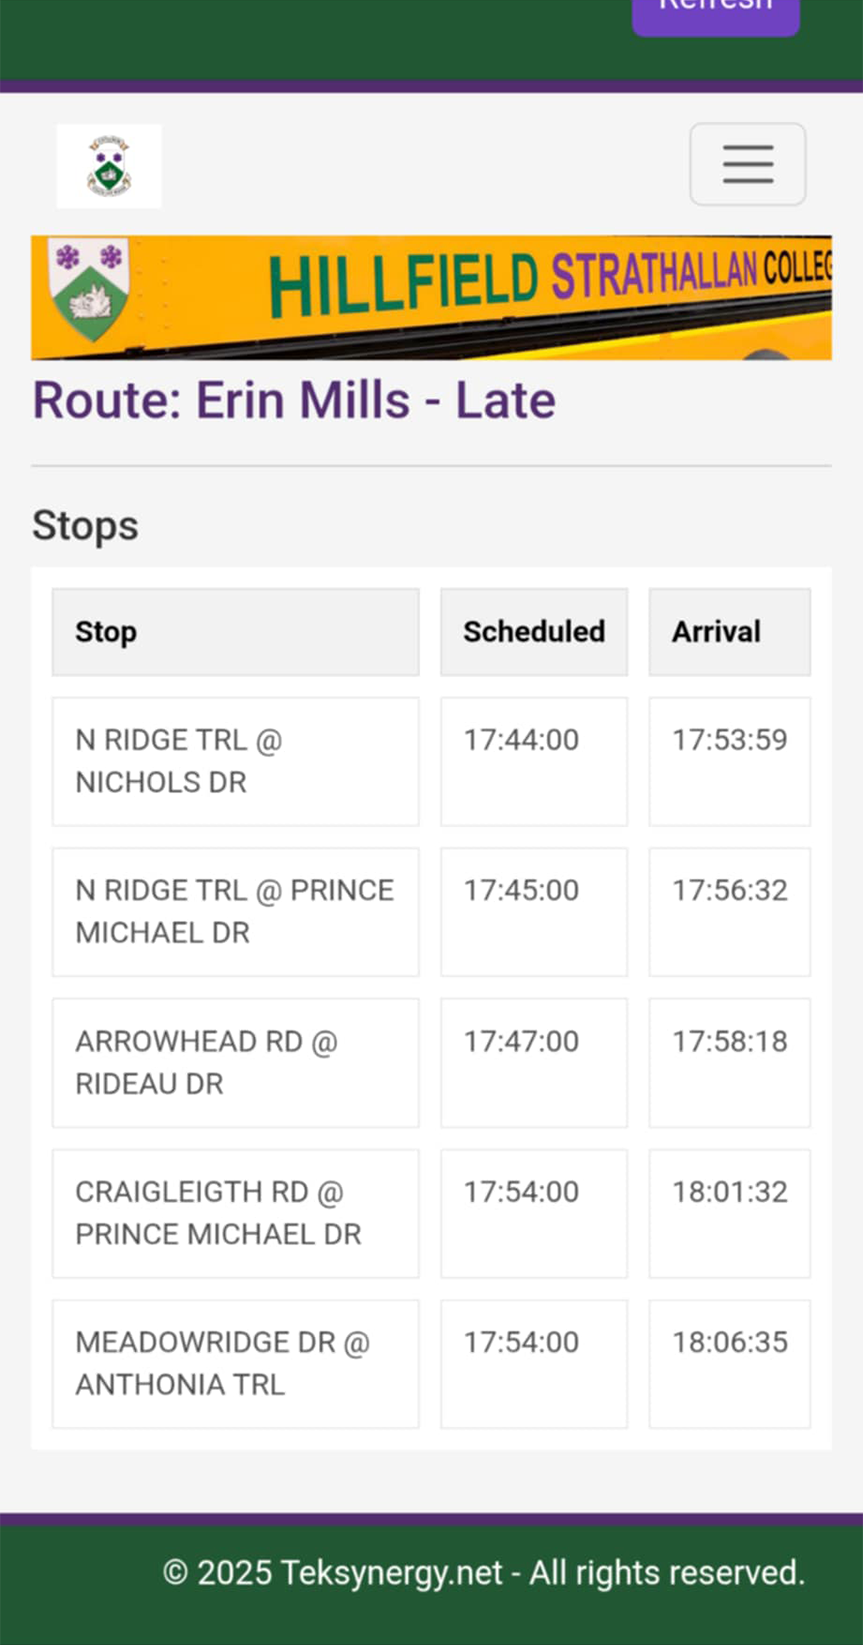
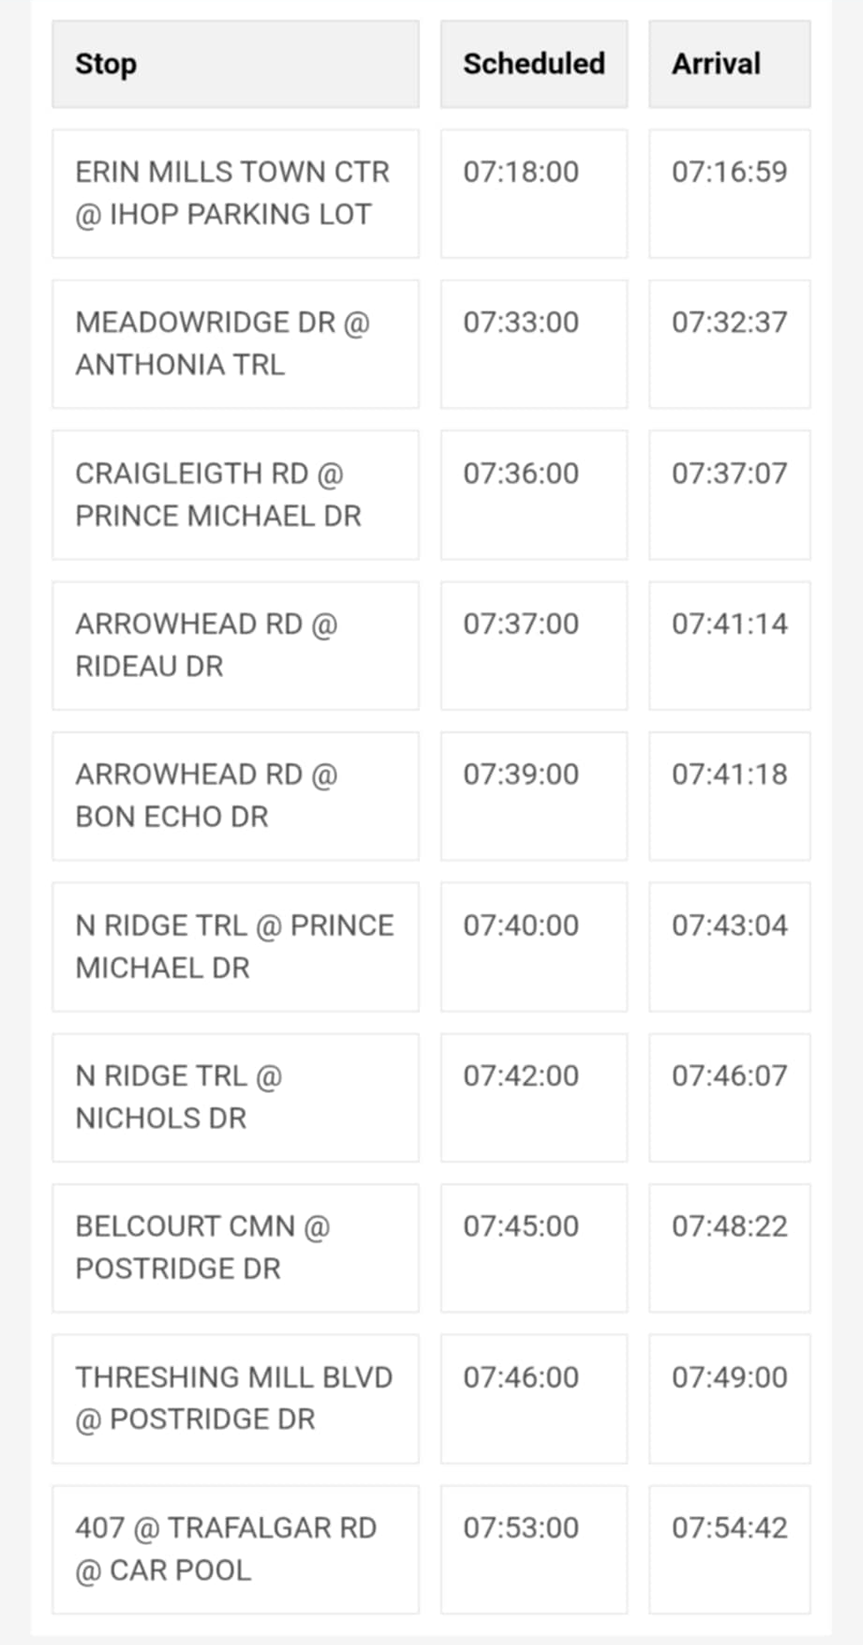
After completing a run drivers can review the run details — completed stops, arrival/departure timestamps, and any exceptions or incident notes. If any stops were late, the UI highlights them and the driver can add notes explaining the reason (traffic, weather, mechanical).
Final steps
- After review the driver may press Logout or return to the Dashboard for a new run.
- All final actions are logged and unavailable once the user logs out for audit purposes.
For driver training materials or to request changes to the flow, contact Dispatch.